What's in this note
- Why documentation decides a storm damage claim
- Before you start
- Step 1: Make sure everyone is safe before you document
- Step 2: Photograph and video every angle of the damage
- Step 3: Build a room by room inventory of the damage
- Step 4: Make temporary repairs and save every receipt
- Step 5: Report the loss and get a claim number
- Step 6: Walk the adjuster through the damage
- Step 7: Check the offer and push back on a lowball
- A worked example: a wind and hail storm claim end to end
- Common mistakes that shrink a storm damage payout
- Troubleshooting: when a storm claim stalls
- Your storm damage documentation checklist
- The bottom line
Short answer: To document storm damage for a claim, make the property safe, then photograph everything before cleanup or permanent repairs, capturing wide shots and close shots of every damaged area plus short video, and keep a structure list separate from a contents list. Make only reasonable temporary repairs, such as tarps and board-ups, and keep the receipts, because they are commonly reimbursed. That record and your own contractor estimates support pushing back on a short offer.
A storm claim is won or lost in the first day, long before the adjuster ever arrives, and almost entirely on the record you build in those hours. The wind or hail passes in minutes, but the evidence of what it destroyed starts disappearing the moment you begin cleaning up, and an adjuster who inspects three days later can only pay for damage that can still be seen or proven. This walkthrough takes you from the first minutes after the storm, through photographing, inventorying, and protecting the property, all the way to the adjuster visit and pushing back on an offer that comes up short.
By the end you will be able to build a documentation record that defends the full value of your loss, know exactly what to capture before you touch anything, and recognize where storm claims quietly leak money. Documenting the damage is the front half of a claim, so once your record is solid, our home insurance claim walkthrough covers the reporting and settlement mechanics in full, and for the coverage picture behind it all, our note on what home insurance actually covers is the companion piece. You can also pressure-test the payout your evidence is protecting with the companion below as you read.
Key takeaways
- The outcome: a dated, room-by-room record of the storm damage that an adjuster arriving days later can actually pay against, with as little left on the table as possible.
- The order that matters most: document everything before you clean up or make permanent repairs, because undocumented damage is effectively unpaid damage.
- The habit that saves the claim: capture wide shots and close shots of every damaged area, plus short video, and keep the structure list separate from the contents list.
- The reimbursable step people forget: reasonable temporary repairs, tarps, board-ups, water shutoff, are commonly paid back, but only if you keep the receipts.
- A first offer is a starting position: a documented record of photos, inventory, receipts, and your own contractor estimates is what lets you push back on a lowball with evidence, not argument.
Why documentation decides a storm damage claim
Every part of a storm claim eventually reduces to one question: can you prove it. The insurer pays for damage that is documented, tied to a sudden covered event, and priced against a scope everyone can see, and it discounts or declines the rest. That is why the documentation you build in the first hours is worth more than any phone call you make later. A well-photographed, itemized loss walks into the adjuster inspection as a case; an undocumented one walks in as a disagreement, and disagreements settle low.
Storm damage carries its own documentation challenges that a burst pipe does not. The damage is often spread across the whole property, roof slopes, gutters, siding, windows, fences, sheds, and landscaping, rather than concentrated in one room, so it is easy to miss whole categories. Roof damage in particular is hard to see from the ground and easy to underpay, which is exactly where hail and wind claims tend to come in light. And storms create urgency: rain keeps entering through a torn roof, so you are documenting and protecting the property at the same time, under pressure, which is when steps get skipped.
One distinction matters before you start, because it decides which claim you are even documenting. Wind, hail, and rain that enters through a storm-created opening are commonly covered by a standard homeowners policy. Flood, meaning rising water that comes from outside the home, is excluded from every standard homeowners policy and needs a separate flood policy with its own rules. Our water-damage coverage note walks exactly where that line falls between the internal and wind-driven water a homeowners policy covers and the external flood it does not. Everything below assumes an ordinary homeowners storm loss from wind, hail, or falling objects; if the water rose from outside, the payout shape and deadlines change.
Before you start
This walkthrough assumes the storm has passed and the immediate danger is over. Gather these before you start documenting, because having them in hand turns a chaotic scene into a checklist:
- A charged phone or camera with storage free. Your entire claim rests on photos and video taken before cleanup, so battery and space come first. A second device as backup is worth it.
- Your policy number and insurer contact. Find them on your declarations page, your app, or your latest renewal notice, along with the 24-hour claims phone number.
- Your deductible. This single number decides whether a smaller storm loss is even worth filing. If you are unsure how it was set, our note on choosing your deductible explains the tradeoff, and note that many policies carry a separate, higher wind or hail deductible.
- A way to track receipts. A folder or a phone album for every dollar you spend on tarps, board-ups, drying, and temporary lodging.
- Any before photos you already have. Older pictures of the roof, rooms, or yard, from listings, records, or family photos, are powerful proof of what the property looked like before the storm.
Time and difficulty: the active documenting takes a few hours, but the full claim commonly runs a few weeks to a few months from report to final payment, and longer after a widespread storm that overloads the adjusting network. The work is not hard, it is just unforgiving about order. Document first, protect the property temporarily, keep every receipt, and report promptly.
Step 1: Make sure everyone is safe before you document
The first step is the one people skip in the rush to assess the damage, and skipping it is the most dangerous mistake in the whole process. Before any photograph, make sure people are safe and the property is safe to be around. Storms leave hazards that are not obvious: downed or sagging power lines, gas leaks, weakened or partially collapsed roofs, broken glass, standing water near electrical outlets and appliances, and debris that can shift. If there is any doubt, keep everyone out and call the utility company or the fire department rather than investigating yourself. No photograph is worth a shock, a fall, or a collapse, and your health is not an insurance line item.
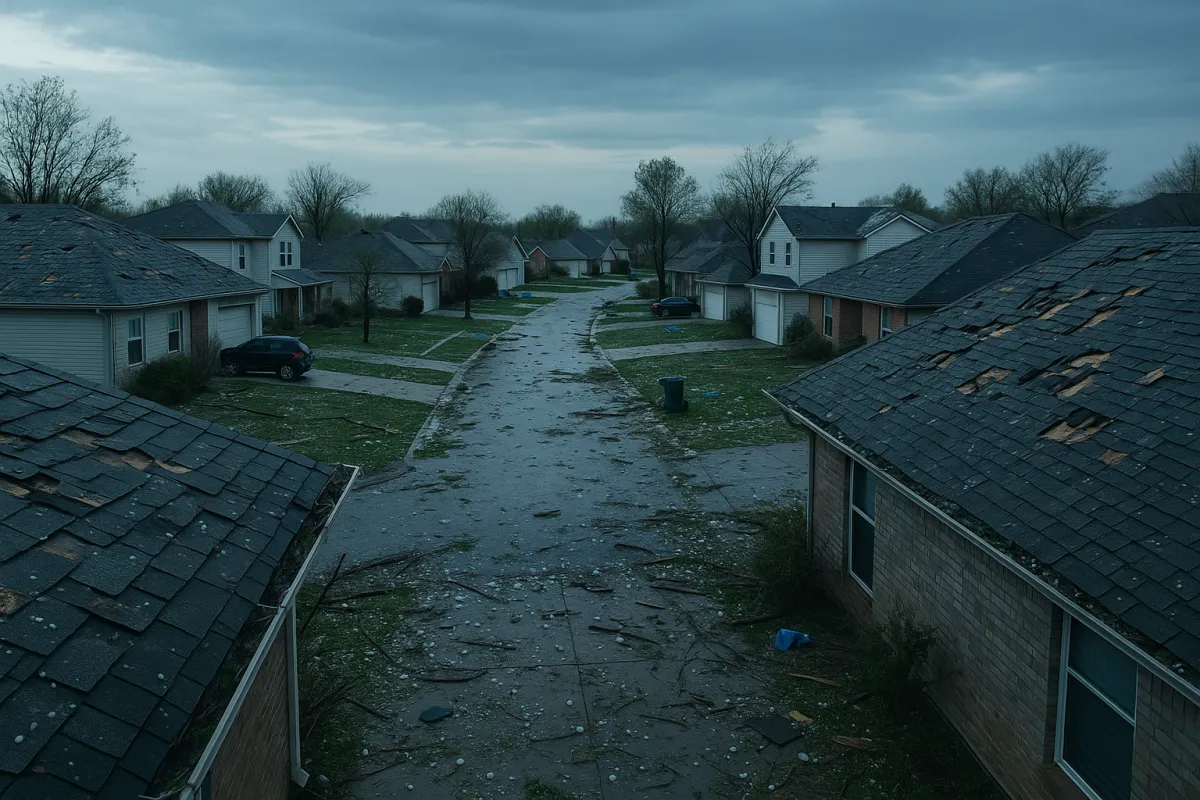
Once you have confirmed it is safe, resist two temptations at once: the temptation to climb onto a storm-damaged roof to photograph it, and the temptation to start clearing debris before you capture it. You can document roof damage safely from the ground with a zoom, from a window, or with a drone if you have one, and a roofer can inspect the surface later. Photograph the scene as you found it, including the hazards and the debris field, because that record helps tie the loss to the storm.
The watch-out here is timing your temporary protection against your safety. You are expected to take reasonable steps to stop further damage, which the next steps cover, but not at the cost of putting yourself on a wet, weakened roof in poor light. If the property is genuinely unsafe to enter, note that, keep everyone clear, and tell your insurer when you report, since an unsafe structure can change how the inspection is handled. Use the companion below to see the rough shape of the payout your documentation will be protecting once the scene is safe to work.
Step 2: Photograph and video every angle of the damage
With the scene safe, step two builds the backbone of the claim, and this is where storm losses are most often under-documented. Walk the entire property methodically rather than randomly, and capture two kinds of shots for everything: wide shots that establish the whole area, a full roof slope, an entire elevation of the house, a whole room, and close shots that show the specific damage in detail. For the exterior, that means each roof slope, every side of the house, gutters and downspouts, vents and flashing, siding, windows and screens, the garage, fences, sheds, and any other structures, plus damaged landscaping and the debris that caused the harm, like a fallen limb or a yard covered in hail.
Then move inside and capture every point where the storm got in: water-stained ceilings, wet insulation, buckled flooring, damp drywall, broken windows, and any damaged belongings beneath the intrusion. Shoot short video as well as stills, slowly panning each room and each roof slope while you narrate what the camera sees and say the date out loud. Photograph model and serial numbers on damaged appliances and electronics while they are still legible. An illustrative storm loss might carry 22,000 dollars of structure damage across the roof and interior, and only wide-plus-close coverage of every slope and room defends a number that size.
The watch-out is the invisible damage you will forget to shoot. Hail bruising on shingles, lifted shingle tabs, dented soft metals like gutters and vent caps, and cracked seals are subtle and easy to miss from the ground, yet they are exactly the items a roofer and an adjuster argue over. Get as much detail as you safely can, and if you cannot see the roof surface, photograph what you can and note that a professional roof inspection is needed. The more complete your visual record, the harder it is for a later estimate to quietly shrink the scope, and the companion below shows how the pieces of a storm loss typically split so you know which areas to shoot most carefully.
Step 3: Build a room by room inventory of the damage
Photos prove the damage happened; a written inventory proves what it is worth, and step three is where the contents half of a storm claim is defended. Alongside the images, build a running list of every damaged item, organized room by room so nothing is forgotten. For each item, note a short description, the approximate age, the brand or model where it matters, and a rough replacement value. Keep the structure damage, meaning the building itself, on a separate list from the contents, meaning your belongings, because that is how the claim is usually organized and settled. Our home-inventory walkthrough covers how to build this record in detail, and doing it before a storm makes an after-storm claim far faster.
Go room by room and be specific. In a soaked upstairs bedroom, that might be a mattress and frame, a rug, a dresser, and the electronics on it; in a flooded garage, tools, a freezer, and stored boxes. For high-value belongings, jewelry, art, collectibles, note them separately, since policies often cap those categories and you may need proof of value. An illustrative contents loss of 9,000 dollars is only as collectible as the list behind it: a thin inventory with no ages or values is the quiet reason contents payouts come in light, especially where they settle at depreciated value.
The watch-out is the same counterintuitive one that governs the whole claim: do not throw anything out before it is on the list and in the photos. The urge to bag ruined belongings and haul them to the curb immediately is strong, and it is exactly what erases the contents claim. If you must discard something for health or safety, photograph it thoroughly and keep a sample if you safely can. Set your own structure and contents figures in the companion below to see how the total loss and the illustrative payout move as your inventory fills in.

Step 4: Make temporary repairs and save every receipt
With the damage documented, step four protects the property from further loss, and it does double duty: it is both a policy duty and a reimbursable expense. Most homeowners policies require you to take reasonable steps to prevent additional damage after a covered event, so if the storm tore open the roof, tarp it before the next rain; if a window broke, board it up; if water is pooling, get it draining and start drying the space with fans and dehumidifiers. These are temporary, protective measures, and their reasonable cost is commonly reimbursable as part of the claim, which is why the receipts matter as much as the work.
Keep a receipt or a photo of a receipt for everything: tarps, plywood, fasteners, a board-up service, tarps installed by a roofer, fans and dehumidifier rental, and any emergency lodging if the home is uninhabitable, since loss-of-use coverage may help pay for that. An illustrative 1,200 dollars of tarps, board-ups, and drying equipment is money the claim can pay back, but only if it is documented. Photograph each temporary repair after you make it, so the record shows both the damage and the reasonable step you took to contain it.
The watch-out is the boundary between temporary protection and permanent repair, because crossing it early costs money two ways. You are expected to prevent further loss, but you should not replace the roof, rebuild the wall, or install new flooring before the adjuster has inspected, since permanent repairs done too early erase the evidence of scope and can reduce what is paid. Tarp it, board it, dry it, photograph it, and then wait for the inspection before anything becomes permanent. At the same time, do not delay the temporary steps, because if failing to protect the property lets mold or rot spread over the following days, the insurer can decline that added damage as something you could have prevented. Run your figures through the companion below to see the payout those temporary steps are protecting.
Step 5: Report the loss and get a claim number
With the scene documented and protected, report the loss, and do it promptly. Call the claims number on your declarations page, use your insurer’s app, or call your agent, ideally within a day or two of the storm. Prompt notice is both a practical advantage and a policy duty: most homeowners policies require you to report a loss promptly, and after a widespread storm the adjusting network fills fast, so early filers tend to be inspected sooner. When you report, have your policy number ready, describe the cause and the date of the storm, and give a rough scope of the damage without committing to a final figure.
This is the call where you lock down the facts that govern the rest of the process. Ask for and write down your claim number, then get the name and contact details of the adjuster who will handle your file. Ask two direct questions and get the answers in writing if you can: exactly what documentation the insurer needs from you, and what your deadlines are, including any proof-of-loss window, which is often around 60 days after the insurer requests it, and the suit-limitation deadline in your policy. Note whether a separate wind or hail deductible applies, since storm losses often carry one that is higher than the standard deductible. Take notes on every conversation: the date, the person, and what was said, because a documented paper trail settles disputes later.
The watch-out is being accurate without being speculative on that first call. Describe what happened and what you can see, but do not guess at causes you are unsure of or commit to a damage total before the full scope is documented, since early numbers tend to move and the roof scope in particular is rarely known on day one. Do not let the verbal report substitute for the written claim either; the phone call opens the file, but the documentation the insurer requests still has to arrive on time. Our full claim walkthrough covers the reporting and settlement steps in depth, and the companion below keeps a running estimate of the payout so the conversation stays grounded in a real number. One routing check before you dial: if any of the water rose from outside the home, that portion is not a homeowners loss at all, it belongs on a separate flood policy, and our walkthrough on how to file a flood insurance claim covers that process and its stricter deadlines.
Step 6: Walk the adjuster through the damage
The adjuster visit is the hinge of the whole claim, and your documentation is what makes it go your way. The insurer assigns an adjuster to inspect the damage and prepare a repair estimate, and it helps to remember who they work for: the adjuster represents the insurance company, not you, which does not make them an adversary but does mean their estimate reflects the insurer’s pricing and scope. When they arrive, walk the property with them, hand over your photos, video, and itemized inventory, and point out damage that is not obvious. On a storm loss the easy-to-miss items are on the roof and in the soft metals, so surface the hail bruising, the lifted shingles, the dented gutters and vents, and any water intrusion behind walls or under flooring.
Here is the move most homeowners skip: get your own written repair estimates from licensed contractors, independent of the adjuster, and for a storm loss get a roofer to inspect the roof surface directly. You have every right to do this, and it is the single best way to check whether the insurer’s number covers the real scope and cost of the work in your area. If your roofer and interior contractor price the repairs at an illustrative 25,000 dollars while the adjuster’s estimate lands at 20,000 dollars, that 5,000 dollar gap is not a complaint, it is a documented basis for a supplement. Line the two estimates up item by item so you can see exactly where they diverge, whether on scope, materials, or labor rates.
The watch-out is the storm-chaser problem. After a big storm, contractors go door to door promising a free roof and asking you to sign a contract or an assignment of benefits that hands them your claim payout. Be cautious: a legitimate contractor gives you an estimate, not a document that captures your insurance proceeds before you understand it. For a large or complex loss, you can hire your own licensed public adjuster, who works for you rather than the insurer for a fee, typically a percentage of the settlement, which can be worth it on a big storm claim and is rarely worth it on a small one. Compare your contractor estimates against the illustrative payout in the companion below to see whether the offer covers the work.

Step 7: Check the offer and push back on a lowball
When the offer arrives, read it as a short stack of levers rather than one number, because that is how it was built, and because storm settlements are among the most commonly underpaid. Start with the covered damage, the repair or replacement cost of everything the policy responds to, split between structure and contents. From there, two things reduce it before you see a dollar: depreciation and your deductible. On a replacement-cost policy the insurer typically pays the depreciated actual cash value first and holds back the recoverable depreciation until you complete the repairs and submit receipts, then releases it, so a light first check is often not the final number. Our replacement-cost versus actual cash value note breaks that mechanism down, and it matters most on an aging roof, where depreciation can be steep.
If the offer looks short, treat it as a starting position, not a verdict, and this is where your documentation finally pays off. Compare the adjuster’s estimate line by line against your own contractor and roofer bids and your photo and inventory record. The gap on a storm claim usually sits in a few predictable places: a roof scope that pays for a repair when the slope needs replacement, hail or wind damage the adjuster did not credit, soft-metal and interior items left off entirely, materials or labor priced below your local rates, or depreciation taken more aggressively than seems fair. Naming the specific disagreement is what turns a vague complaint into a supplement the insurer can act on.
The mechanics: put your disagreement in writing, attach the evidence, the photos, the video, the itemized inventory, the contractor bids, the receipts, and submit it as a documented supplement or a formal appeal within your policy’s deadlines. Keep copies of everything, because a disputed claim is won on paper, not on the phone. Our appeal walkthrough covers the escalation path, including your state department of insurance and, for a large loss, a public adjuster or an attorney experienced in coverage disputes. The watch-out: do not let the suit-limitation deadline in your policy pass while you negotiate informally, and weigh whether a small storm loss is even worth filing against the premium effect our claim-and-premium note describes. Run your damage figure, deductible, and settlement basis through the companion below before you judge the offer.
What an illustrative storm claim pays
An illustrative 31,000 dollar wind-and-hail loss: 22,000 in structure damage across the roof and interior and 9,000 in contents, on a replacement-cost policy with a 2,000 dollar deductible, plus reimbursable temporary repairs and some loss-of-use lodging. Your policy, insurer, and state can move every figure.
Bars are scaled to the ~$22,000 structure figure. The documented pieces, structure, contents, loss-of-use, and temporary repairs, are what the claim can pay; the deductible comes off the top, and on a replacement-cost policy part of the structure award is released only after repairs are complete.
A worked example: a wind and hail storm claim end to end
Walk one illustrative home through the whole process. An afternoon supercell drops hail and drives 70-mile-an-hour gusts across the Okafor family’s neighborhood. By the time it passes, the roof has lost shingles on two slopes and is bruised with hail across a third, a gutter run is torn loose, two windows are cracked, and rain that entered overnight has stained the ceiling and soaked the carpet and a bed in an upstairs room. The Okafors carry a replacement-cost homeowners policy with a 2,000 dollar deductible and a separate wind-and-hail deductible they will need to confirm.
Step one: they confirm no one is hurt and no wires are down, keep everyone off the wet roof, and photograph the scene as they found it. Step two: from the ground and an upstairs window, they capture wide and close shots of all three roof slopes, every elevation, the torn gutter, the cracked windows, and the hail in the yard, then move inside and photograph the stained ceiling, the soaked carpet, and the ruined bed and dresser, shooting video and narrating the date. Step three: they build a room-by-room inventory, structure on one list and contents on another, noting the mattress, frame, carpet, and dresser with ages and rough values. Step four: they tarp the two open slopes, board a cracked window, and run fans on the carpet, keeping every receipt, an illustrative 1,200 dollars of tarps, board-up, and drying.
Step five: that same day they call the claims line, get a claim number, write down the adjuster’s name and their deadlines, and confirm the wind-and-hail deductible. Step six: the adjuster inspects, and the Okafors hand over their photos and inventory and have a roofer inspect the surface; the roofer documents hail bruising the adjuster initially credited as cosmetic, and the two estimates are lined up item by item. Step seven: the covered damage lands at an illustrative 22,000 dollars for the structure and 9,000 dollars for contents, plus 2,500 dollars of loss-of-use lodging while the upstairs is repaired; the insurer pays the depreciated amount first, then releases the recoverable depreciation once the roof and room are repaired and receipts are in, and the Okafors absorb the 2,000 dollar deductible. When the first estimate underpaid the hail-bruised slope, they supplemented with the roofer’s report rather than assuming the offer was final. Same storm, a clean recovery, because the documentation came first. Set your own damage figure, deductible, and settlement basis in the companion below to see your version of this walkthrough.
What defends a storm claim: the documentation mix
Illustrative shares of the evidence that carries a storm claim through the adjuster inspection and any dispute. Photos and video do the heaviest lifting, but the written inventory and the receipts and estimates are what defend the contents and the scope. Real weighting varies by loss.
The three parts sum to 100 percent of an illustrative documentation record. No single part carries a claim alone: the photos prove the damage, the inventory prices the contents, and the receipts and estimates defend the scope against a low offer.
Common mistakes that shrink a storm damage payout
Most underpaid storm claims trace to a short list of avoidable errors. Watch for these:
- Cleaning up before documenting. Hauling ruined belongings to the curb and tearing out wet drywall before you photograph and inventory them is the most expensive mistake, because the adjuster can only pay for damage that can be verified.
- Under-documenting the roof. Roof damage is the hardest storm damage to see and the most commonly underpaid. Capture every slope, surface the hail bruising and lifted shingles, and get an independent roofer's inspection rather than relying on a ground-level guess.
- Losing the temporary-repair receipts. Tarps, board-ups, and drying are commonly reimbursable, but only if you kept the receipts and photographed the work. No receipt, no reimbursement.
- Making permanent repairs too early. Replacing the roof or rebuilding a wall before the adjuster inspects erases the evidence of scope and can reduce what is paid. Keep repairs temporary until the inspection.
- Signing over the claim to a storm chaser. A contractor who asks you to sign a contract or an assignment of benefits before you understand it may capture your payout. Get an estimate, not a document that hands away your claim.
- Accepting the first offer without checking it. The first check is often the depreciated amount, not the full award, and the estimate may miss whole categories. Compare it against your own bids before you cash it.
Troubleshooting: when a storm claim stalls
What if I already cleaned up before photographing? Do not panic, but move to reconstruct the record. Gather any photos you or neighbors took during or right after the storm, any before photos of the rooms and roof, receipts for what you discarded, and written statements from anyone who saw the damage. Get contractor and roofer inspections documenting what remains and what was clearly storm-caused, and be honest with the adjuster about the sequence. A reconstructed record is weaker than a contemporaneous one, but it is far better than nothing, and it is why documenting a home inventory before a storm, as our home-inventory walkthrough describes, pays off after one.
What if the adjuster missed damage? That is common on storm losses, especially on the roof and in soft metals. Point it out during the visit if you can, and if it surfaces later, when your roofer inspects or when a repair is opened up, document it with photos and an estimate and submit it as a supplement. On a replacement-cost policy you can often reopen a claim for additional damage discovered during repairs, so a missed item is not necessarily lost.
What if the payout is too low? Compare the adjuster’s estimate line by line against your own contractor and roofer bids and your inventory. Too-narrow roof scope, uncredited hail damage, and aggressive depreciation on an older roof are the usual culprits. Submit the difference as a documented supplement, and remember that on a replacement-cost policy part of your award, the recoverable depreciation, is released only after you complete the repairs, so a light first check may not be the final number. Our appeal walkthrough covers the escalation path.
What if a separate wind or hail deductible applies? Many policies in storm-prone regions carry a wind or hail deductible that is a percentage of the dwelling limit rather than a flat dollar amount, which can be far higher than the standard deductible. Confirm which deductible applies to your loss before you judge the offer, since it changes the math on whether a smaller claim is worth filing at all. Weigh it against the premium effect described in our claim-and-premium note.
Your storm damage documentation checklist
Save this and work it top to bottom when a storm hits:
- Confirm everyone is safe; keep clear of downed lines, gas, standing water near outlets, and weakened structures, and call the utility if in doubt.
- Do not climb a wet, damaged roof; document it from the ground, a window, or a drone.
- Photograph every roof slope, elevation, structure, and interior intrusion, wide shots and close shots, plus short narrated video with the date.
- Capture the hard-to-see items: hail bruising, lifted shingles, dented gutters and vents, cracked seals, and water behind walls or under flooring.
- Build a room-by-room inventory of damaged belongings with ages and rough values, kept separate from the structure list.
- Take reasonable temporary steps to stop further damage, tarp, board up, dry, and photograph the work and keep every receipt.
- Do not begin permanent repairs or discard items before the adjuster inspects.
- Report the loss promptly, get a claim number, and confirm your deadlines and any wind or hail deductible in writing.
- Get your own contractor and roofer estimates and compare them against the adjuster's, item by item.
- Read the settlement as covered damage minus depreciation and deductible; supplement or appeal in writing if it comes up short.
The bottom line
Documenting storm damage well is not complicated, but it is unforgiving about order. Keep everyone safe first, then photograph and video every slope, elevation, and room before you touch anything, build a room-by-room inventory of your belongings, and take reasonable temporary steps to protect the property while keeping every receipt. Report the loss promptly, walk the adjuster through the damage with your record in hand, get your own contractor and roofer estimates, and read the settlement as covered damage minus depreciation and your deductible, pushing back on a low offer with evidence rather than argument. The record you build in the first hours is the whole claim; once it is solid, our home insurance claim walkthrough covers the reporting and settlement in full, and our note on what home insurance covers is the coverage companion. When a storm does hit, run your own numbers through the companion below so you know the shape of the payout your documentation is protecting.

This storm-damage walkthrough is educational reading about how documenting a home insurance claim commonly works, not insurance, legal, or financial advice, and it does not describe your specific policy or your loss. Home coverage, deductibles, wind and hail deductibles, settlement basis, depreciation, deadlines, and appeal rights vary between insurers, between policies, and between states, and they change over time. The damage figures, the depreciation, and every dollar amount and timeline above are illustrative examples chosen to show how documentation fits together, not a quote, a deadline you can rely on, or a promise of how any claim will be paid. Whether a storm loss is worth filing, and how it affects your premium, depends on your own insurer and history. Before you act, read your declarations page and full policy, follow the exact instructions your insurer gives you, and consult a licensed insurance professional, public adjuster, or attorney about your particular loss.
Frequently asked questions
How do I document storm damage for an insurance claim?
Start by making sure the property is safe to enter, since storms leave downed lines, weakened roofs, and standing water near outlets. Before you clean up or repair anything, photograph and video every damaged area, wide shots to establish each room or elevation and close shots of the specific damage, and note the date. Then build a written, room-by-room inventory of damaged belongings with ages and rough values, keep the receipts from any temporary repairs, and gather your own contractor estimates. This record is what an adjuster who arrives days later can actually pay against, because undocumented damage is effectively unpaid damage. Treat every figure and timeline in this walkthrough as illustrative and confirm the exact steps and deadlines with your own insurer, since procedures vary by policy and by state.
What should I photograph after a storm?
Photograph both the whole and the details. For the structure, capture wide shots of each roof slope, every elevation of the house, fences, sheds, and other structures, then close shots of the specific damage: lifted or missing shingles, dented gutters and vents, cracked siding, broken windows, and any water intrusion inside. For contents, photograph each damaged belonging next to the wider room shot, and capture model and serial numbers on appliances and electronics while they are still legible. Shoot short video as well as stills, narrating what the camera sees and the date, and photograph the source of the damage, such as a fallen limb or a hail-strewn yard, so the loss ties to a sudden, covered event. Keep everything organized by room and by structure so nothing is forgotten when you file.
Do I need to document storm damage before I clean up?
Yes, and this is the single most important timing rule in a storm claim. The instinct to start hauling ruined belongings to the curb and tearing out soaked drywall right away is exactly what undermines a claim, because the adjuster who inspects days later can only pay for damage that can be verified. Photograph and inventory everything first, then clean up. If health or safety forces you to discard something immediately, such as sodden carpet already growing mold, photograph it thoroughly first and keep a representative sample if you safely can. You are still expected to take reasonable temporary steps to stop further damage, like tarping a roof, but temporary protection and permanent repair are different things, and the permanent repairs should wait for the inspection.
How long do I have to file a storm damage claim?
Most homeowners policies require prompt notice of a loss rather than a fixed number of days, but prompt carries real weight, and waiting can give the insurer a reason to reduce or deny a claim, especially if the delay let the damage spread. After a widespread storm the adjusting network fills quickly, so early filers are often seen first. Separately, many policies set a proof-of-loss window, commonly around 60 days after the insurer requests it, and a suit-limitation clause that caps how long you have to sue if you disagree, sometimes one to two years. Report the loss within a day or two, then meet every documentation deadline the insurer gives you, and ask the insurer to confirm your specific dates in writing and calendar them the day you report.
Will a storm damage claim raise my premium?
It can, because insurers price partly on claim history, and a paid claim can nudge your renewal premium and stay on your record for several years through a shared claims database. That said, a one-time weather loss is often weighted more gently than repeat water-damage or liability claims in many rating systems, and a large storm loss well above your deductible is usually worth filing regardless. The size of any increase is not fixed and depends on your insurer, your state, the claim type, and how many claims you have filed recently. For a small loss that barely clears your deductible, weigh whether to file at all, since it may cost more over time than it pays. Our note on how a claim can affect your premium walks that tradeoff, and every figure there is illustrative rather than a quote.
What is the difference between actual cash value and replacement cost on a storm claim?
Replacement cost, or RCV, pays what it costs to repair or replace the storm-damaged property with new materials of like kind and quality, subject to your limits and deductible. Actual cash value, or ACV, pays the depreciated value, meaning replacement cost minus wear and age, so an older roof or an older sofa is paid as an older item, not a new one. On a replacement-cost policy the insurer commonly pays the ACV amount first and holds back the recoverable depreciation until you complete the repairs and submit receipts, then releases it, so the first check is smaller than the full award on purpose. On an ACV policy that depreciation is simply not recovered. Read your declarations page to see which basis applies to your roof, your dwelling, and your contents, since they can differ, and treat any percentage here as illustrative.
What if the storm damage adjuster's estimate is too low?
Treat a low estimate as a starting position, not a verdict. Compare the adjuster's estimate line by line against your own written estimates from licensed contractors and your photo and inventory record, because the gap usually sits in a few places: a repair scope narrower than the real damage, hidden damage the adjuster missed, materials or labor priced below your local rates, or depreciation taken more aggressively than seems fair. Put the specific disagreement in writing, attach your evidence, and submit it as a documented supplement within your policy's deadlines. Keep copies of everything, because a disputed claim is won on paper, not on the phone. Our appeal walkthrough covers the escalation path, and for a large loss a licensed public adjuster or an attorney experienced in coverage disputes can be worth the fee.
Does documenting storm damage help if the water came from flooding?
Good documentation always helps, but the policy behind the claim changes with the source of the water. Wind, hail, and rain that enters through storm-created openings are commonly covered by a standard homeowners policy, while flood, meaning rising water from outside the home, is excluded from every standard homeowners policy and needs a separate flood policy, usually through the National Flood Insurance Program, with its own stricter deadlines. That distinction changes what you document and which claim you file: for a homeowners storm loss you show the damage came from a sudden covered event like wind or hail, while a flood claim runs on a different clock and a different payout shape. Confirm the specific cause with your insurer, because the same soaked room can be a covered wind claim or an excluded flood loss depending on where the water came from.

Hamza Hai is the editor of SumSured. She holds an MBA and reviews the site's articles against our editorial standards, checking that every figure is labelled for what it is, that nothing is presented as verified fact without a source the reader can check, and that the writing stays useful to a non-specialist.